Creating and deploying Microsoft Azure App Service Plan
tags:
- Azure
- Azure DevOps
- CI/CD Pipelines
- Azure App Service Plans
In this blog I will give you an overview of Microsoft App Service plans, how to create and app Service Plan and finally how to create an App Service. We will talk about options on how to deploy code to App Services. To kick this off let me give you an overview of Microsoft App Service Plan.
App Service Plan Overview
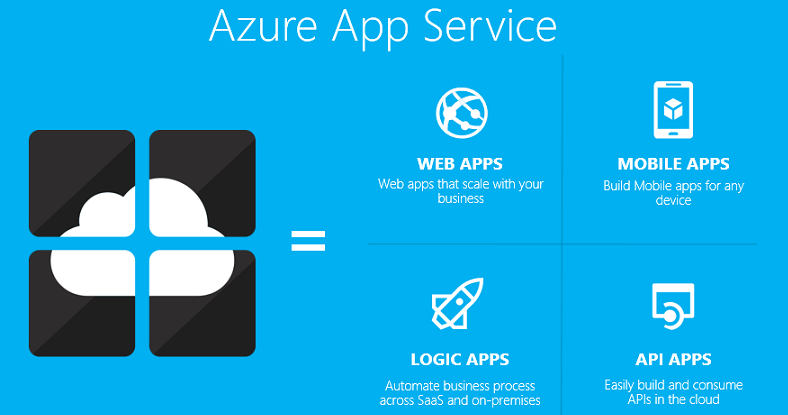
A Microsoft App Service Plan defines a set of compute resources for an App Service to run. Depending on the tier of the App Service Plan you choose you can run multiple App Services in a single App Service Plan. I have listed below what types of App Services you can run with in an App Service plan.
Apps Service types:
- Web Apps
- API Apps
- Mobile Apps
- Function Apps
App Services support a verity of languages such as:
- ASP.NET
- ASP.NET Core
- JAVA
- Ruby
- Node.js
- PHP
- Python
I like to think of an App Service Plan as a container for App Service(s). You cannot have an App Service without an App Service plan. App Services define a set of compute resources that you App Service(s) can use.
App Service Plan defines:
- Azure region
- Min/Max number of VM instances
- Size of VM instances
- CPU
- RAM
- Storage
- Pricing Tier
Please note that you can change the App Service plan pricing tier after it is provisioned. This allows you to test and scale out/up you App Service plan on-demand. There are two types of scaling models within an App Service Plan. Scaling up refers to adding more resources VM instances where Scaling out refers to adding more VM’s to the App Service Plan. With that said you can configure Auto-Scaling which can scale up or down depending on demand.
App service deployments
Multi-tenant Service allows you to deploy your App Service plan on a Shared Network infrastructure. This means you are sharing the network with other tenants in Azure. Alternatively, you can set up an App Service Environment (ASE) which you deploy your own VNET and have an isolated environment for you App Service Plan to run on. There is one more option for deployments and that is called Azure Stack deployment. This allows you to deploy your App Service plan on-premises.
Essentially, an App Service plan is a set of VM’s. Each VM is known as an instance and each instance is hosting an App Service. Each instance has a C:\ and D:\ drive. The C:\ drive is used for temporary storage and the D:\ drive is used for sites code and log files. These drives aren’t stored on each instance, instead they are hosted in a Storage Container and mapped to each instance. All instances in your App Service Plan have access to the D:\ drive. When deploying your code all instances will have access to the same code base via the D:\drive.
Every App runs as a low privileged worker process called the application pool identity. Apps are isolated within an App Service Plan. When using an App Service Plan, you don’t have access to the underlying OS components such as:
- Registry
- Cryptography subsystem
- Graphics subsystem
Now let’s move onto creating an App Service Plan!
Creating an App Service Plan
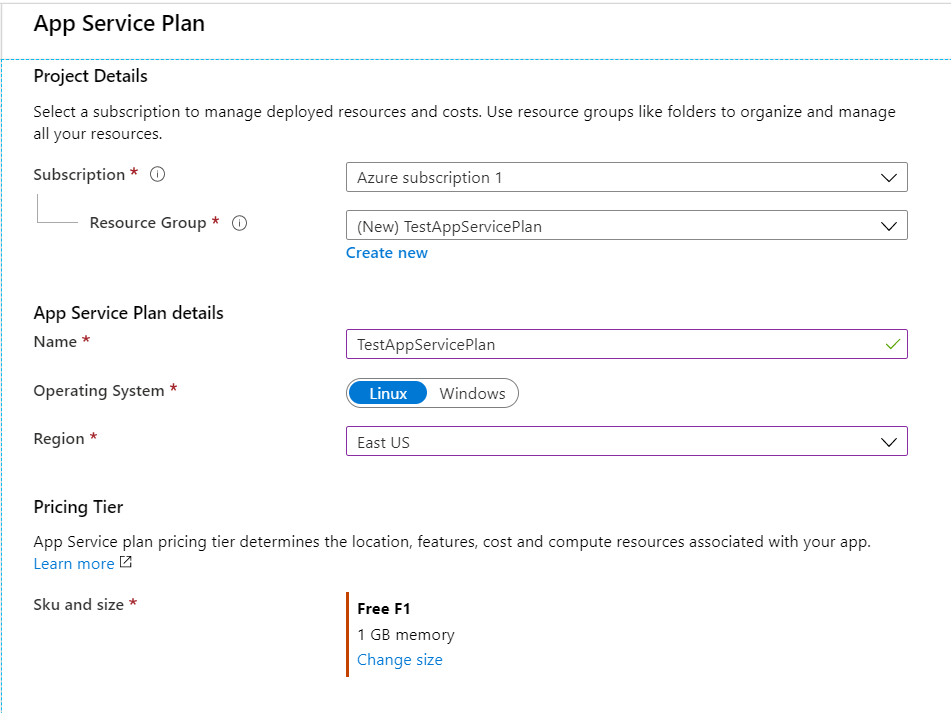
Log into your azure account and search for App Service Plan. Once on the App Service Plan page, click ‘Create App Service Plan’. If you have a resource already created then choose that resource group to hold you App Service Plan. In our case we are going to create a new resource group by clicking on the ‘Create new’ button. This name has to be unique within Azure. Type in the name of the resource group you would like to create and click create. Next, we will need to give the App Service Plan a name which does not need to be unique within Azure.
We will need to choose the underlying OS that our App Services will run on. We have the option of either Windows or Linux, keeping in mind that we will not be able to mix the two OS’s in a single App Service Plan. We will stick with the Windows OS and EastUS region. For the pricing tier we will use the Dev/Test free pricing tier.
Let’s apply a ‘Dev’: ‘Test’ tag to this App Service plan for easy configuration and maintenance. Click next and let’s run the preliminary checks to verify the App Service Plan is configured correctly. Once the checks clear we can create the App Service plan by clicking the create button. Now we will not be able to create a Web App from inside the App Service Plan, we will need to create a new Web App Resource. Search for Web App in azure and click create new Web App. Here we will have an option to add the new Web App to the existing App Service Plan resource group or create a new resource group. For this demo we will add the Web App to the existing resource group for the App Service Plan.
We will need to name the Web App which will need to be unique across Azure. The name is prefixed with ‘.azurewebsites.net’ prefix. We will have an option to publish the Web App via Code or a Docker container. We will publish the Web App using the Code option. There is an option for runtime which the Web App will use when running. Keep in mind some of these Runtimes can only be run on respective OS’s. In our case we will use .NET Core 3.1 and choose the Windows OS. We will choose the East US for the region. This will find App Service Plan that we provisioned earlier and default to that App Service Plan. If you have multiple app Service plans be sure to choose the correct one.
Next, we will have an option to choose if we want to add monitoring to our Web App but in our case, we will turn off monitoring. We will apply a ‘Dev’:‘Test’ tag to our Web App can let the preliminary checks run. Once the checks pass, we can create the Web App. Next, I want to take a brief moment and talk to you about networking in regards to Web Apps and App Service Plans.
Networking
With the multi-tenet App Service plan, we use shared resources with one of them being a shared IP address. If you navigate to the Web App and choose Custom Domains you will find the shared IP address our Web App is using. Outbound traffic goes out to the internet through a set of outbound IP address, those IP address can be found on the Properties tab. App Services Access Restrictions restrict incoming network access from a range of IP address and/or virtual network subnet(s). This will block traffic from internet and only allow access from you VNET.
App Service Environment (ASE)
When you run your apps on ‘Production’ or ‘Isolated’ tiers you are using dedicated resources. In our case we are using the ‘Dev/Test’ tier which uses shared resources. App Service Environment is only available on ‘Production’ and ‘Isolated’ tiers. This allows you to have an isolated network, massive scale-out options. DV2 VMs (Powerful VMs), access to on-premise environment, External ASE, and ILB ASE (no public internet access).
App Service Environments allow a max of 100 App Service plan instances. Those App Service Plans cam be distributed and you can have more then 100 App Service plan but you will need to call Microsoft support. Traffic manager can distribute requests between ASE instances and pricing is a flat rate opposed to pay what you use model.
Creating an App Service Environment (ASE)
Login to Azure and search for App Service Environment (ASE). Click create new App Service Environment. Let’s create new resource group for the App Service Environment. I named my resource group ‘ASE-RS-DEV-TEST’ and named the ASE instance ‘ASE-DEV-TEST-JCLARK0909’ We are going to use an internal virtual IP type. Next, we will need to create a virtual network and subnet for the ASE instance to run on. We will need to add a subnet address block which will be the virtual network address block prefixed with ‘.0/28’ Lets add a ‘Dev’:‘Test’ tag. Alternatively, you do not need to create an App Service Environment (ASE) since it is costly, we can stick with the free dev/test pricing tier.
Deploying an App Service
First, let’s discuss the deployment options for deploying apps to an app service plan. We will run through a few option for deploying code to an app service listed below:
-
Azure CLI
-
“Run from package” from Azure Storage
-
Azure DevOps CI/CD pipeline
Azure CLI Deployment
First let’s start by deploying code with Azure CLI. There is a few option when using Azure CLI. You can either login to Azure and use the cloud shell feature which requires a storage container. Alternatively, you can download the Azure CLI to your local machine and run the commands from your local environment. I will be running these commands from my local machine.
Link to download Azure CLI: https://docs.microsoft.com/en-us/cli/azure/install-azure-cli?view=azure-cli-latest
Once downloaded we want to run Command prompt as administrator and run the following command to login.
CMD: az login
A new window will open where you can authenticate to your Azure subscription. You want to verify that the account you are authenticating with has administrator rights to the App Service Plan and the App Service.
Log into Visual Studio and open your solution file. Once opened we can build the solution and right click on the Web app in the solution explorer then click publish. On this screen we will have a few option on where we want to publish the output of our web app build. In our case we are going to publish the web app to a local folder and use the Azure CLI to upload it to the App Service.
I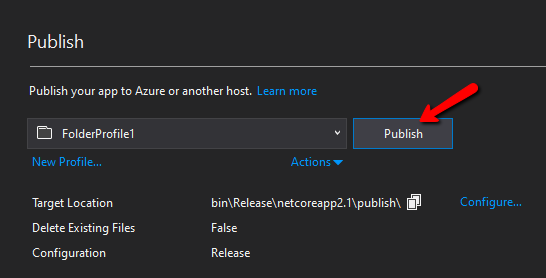
Once you published the web app to a local folder, we need to compress it into a zip file. Right click and choose to send it to a compressed folder. Now we are ready to upload the zip folder via Azure CLI to our App Service. Below I have listed a few parameters and their descriptions.
-
–resource-group = Azure resource group
-
–name = Azure App Service
-
–src = Path to zip folder
-
config-zip = Azure parameter for uploading zip folder
CMD: az webapp deployment source config-zip –resource-group TestAppServicePlan –name TestWebApp0909 –src “C:\repo\Azure\AppServicePlan\03\demos\code1\PSWebApp\PSWebApp\bin\Release\netcoreapp2.1\publish\deployment.zip”
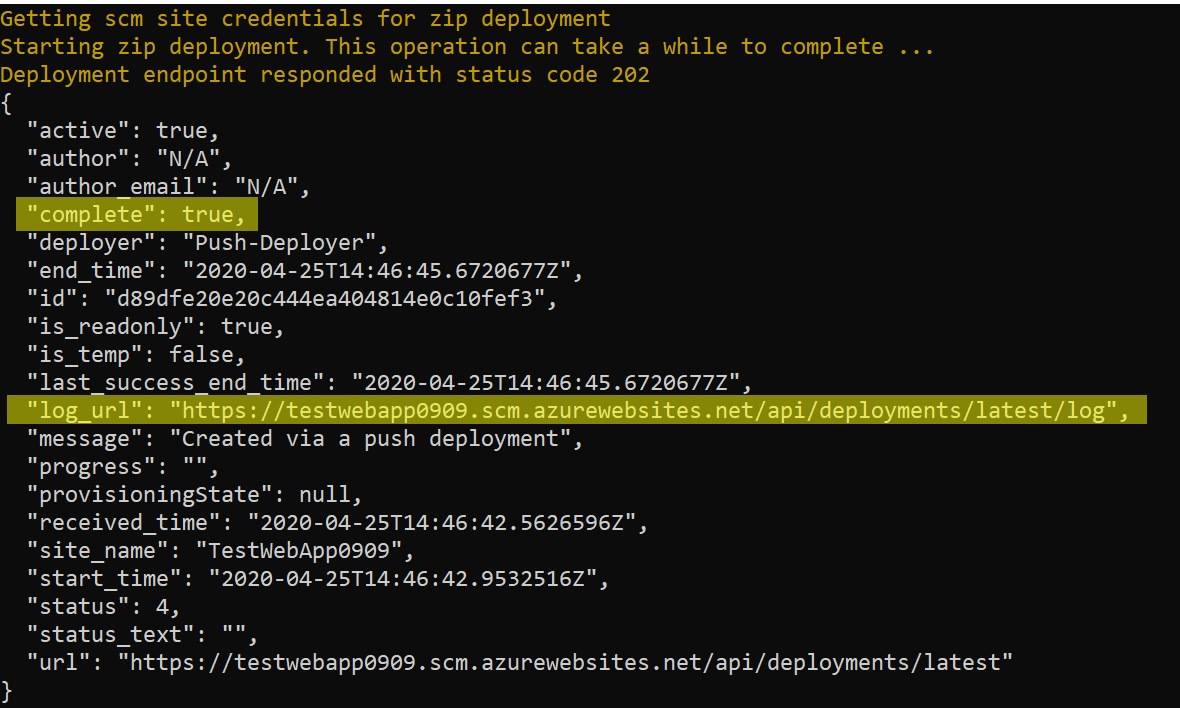
It will take a few second’s for to upload the zip folder to azure and KUDO to unzip the folder. To verify you have successfully deployed the app service plan via Azure CLI you will get back meta data about the deployment in the CMD windows.
Note: There is an item listed in the meta data called ‘Complete’ that lets you know if the deployment was successful. Also, there is a ‘log_URL’ which will point the log file for the deployment. I found the log file to be helpful when troubleshooting failed deployments.
Azure Storage Deployment
To make things easier let’s install Microsoft Azure Storage Explorer.
Download link: https://azure.microsoft.com/en-us/features/storage-explorer/
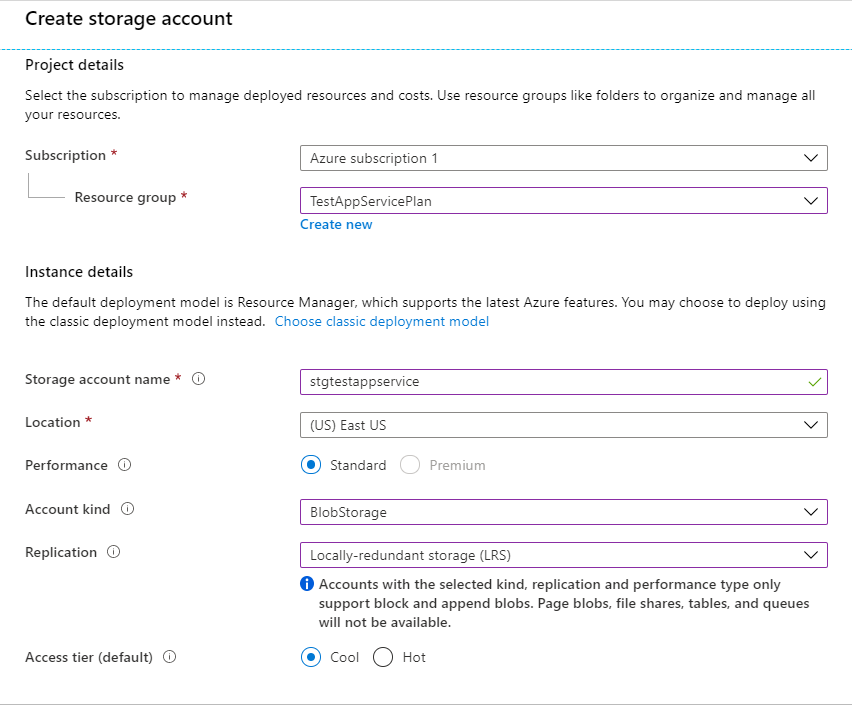
Once Azure Storage Explorer is installed, we will need to sync it to our Azure subscription. On the left-hand side of the screen you will see you Azure storage resources. Now, we need to create an Azure Storage account to store the contents our Web App. Log into Azure and search storage accounts. Click create new storage account then use the App Service Plan resource group or create a new resource group. In our case we will be using the existing App Service Plan resource group. Name the storage account and place it in the same region as the App Service Plan. Let’s select ‘BlobStorage’ and ‘Local-redundant storage (LRS)'. For the access tier lets select ‘cool’ and click next. On the networking tab we can use the default which is ‘Public endpoint (all networks)'. Use the default for the security section and add the ‘Dev’:‘test’ tag to the storage account. Let the preliminary checks run and create the storage account.
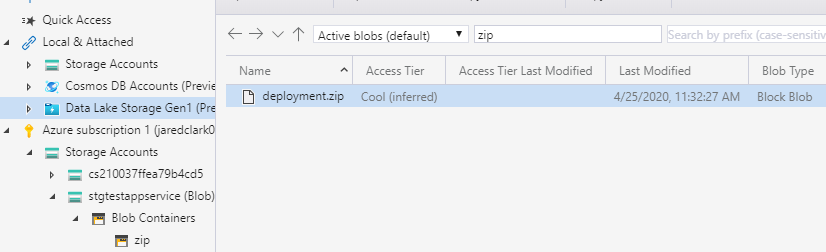
Open the storage account and click on containers then create a new container called ‘zip’. Here will be where we upload the contents of our web app. When you create the container make sure to set the ‘Public access level’ to blob. Open Azure Storage explorer and navigate to the zip blob container then drag and drop the zip folder with our web app.
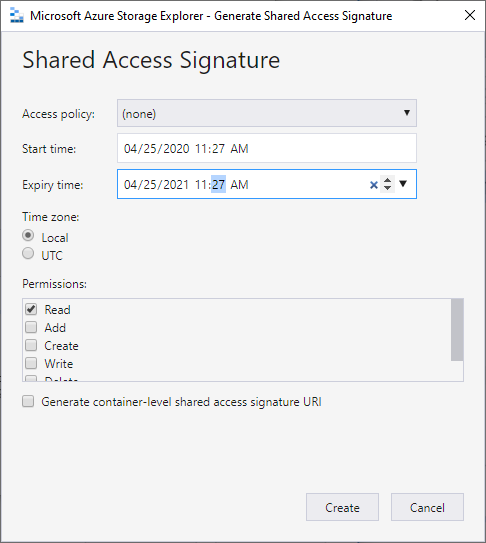
The container access is set to private which means no one can’t get to this storage account without a token. Right click on the zip folder in azure storage explorer and select ‘Get Shared Access Signature’. A new window will appear where we can set some permissions explicitly on this container. The app service needs read access to the storage container. Let’s add that permission to the storage container and set the Expiry time from a year from now. If this is production you will want to set a longer Expiry time.
Another window will open which the storage account URL with the starred access token appended to it. Copy that URL as a query string parameter and open the web app in azure portal. Navigate to configuration and we need to add a new App setting. Click the plus next to ‘New Application Setting’ and add the following parameter with the copied shared access token URL as the value.
Parameter: WEBSITE_RUN_FROM_PACKAGE
Refresh the App Service endpoint URL and now the app service is deployed with using and Azure Storage Account. Whenever that storage account is updated it will deploy the contents of the storage account. Now the site is running from a zip from stored on Azure App Storage.
Azure DevOps (ADO) CI/CD pipeline Deployments
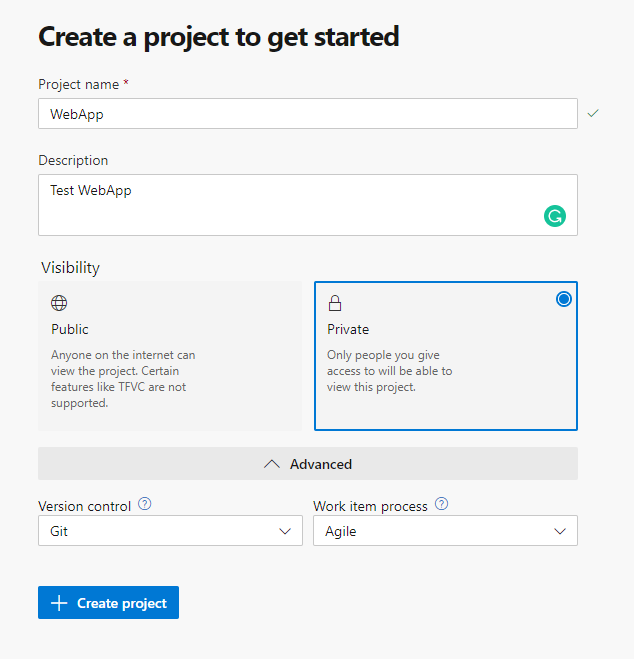
Azure DevOps is going to gives a robust set of features for building and deploying out projects. This will allow us to setup build pipelines that automatically trigger build when developers check in code to the repository. It will allow us to capture a build artifact when then we can deploy it to multiple environments with release pipelines. Let’s start by logging into Azure DevOps and creating a new project. I will call my project WebApp. You will need to specify the source repository for you project. We will be using git to store our repository and work item process will be set to agile.
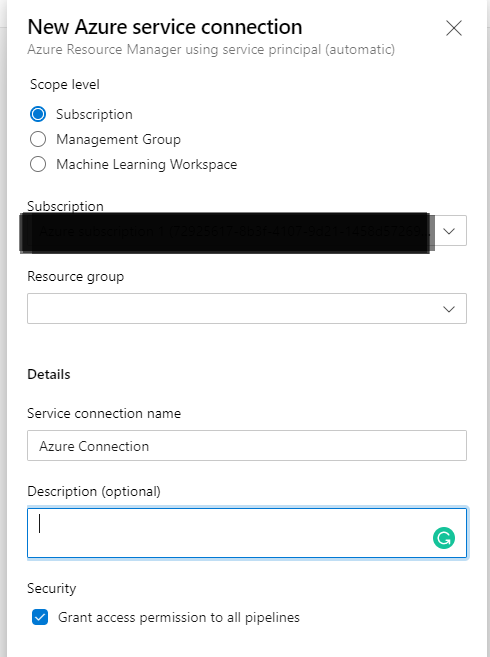
The source files get stored in the repository section of ADO. We are going to want to deploy our code to Azure App service but to do that we need to go to settings and configure our connection to Azure. Click on project settings on the bottom left-hand side of the screen and navigate to ‘Source Settings’. Click ‘Create New Service Connection’ and select ‘Azure Resource Manager’ then select ‘Service Principle(automatic). Add the Azure Subscription ID and name the service connection ‘Azure Connection’. You have an option to scope the Service connection to a resource group but in our case, we will scope to service connection to the entire Azure subscription by leaving the resource group option blank.
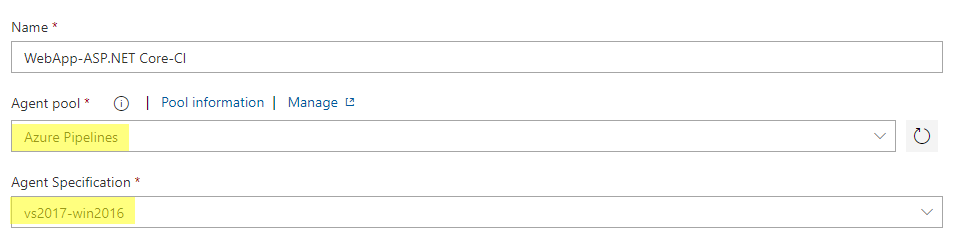
Click save to save the service connection settings to azure and navigate to ‘Pipelines’ then ‘Builds (Pipelines)'. Here we will select our source repository for our web app. We will be using the legacy build pipelines to get started and migrate to YAML. On the bottom of the screen on the builds(pipelines) tab click ‘Use Classic Editor’. Keep the default ‘Azure Repos Git’ and default settings then click continue. Let’s use the template for ASP.NET Core app and apply. Now we get a pre-configured build pipelines with a few task. Under the ‘Pipelines’ section lets choose the Hosted Azure DevOps agent pool. Under ‘Agent Specification’ choose ‘vs2017-win2016’.
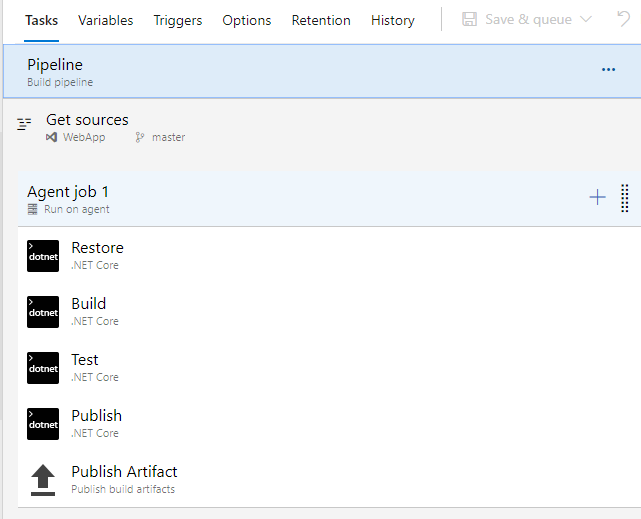
There is a few predefined task in the ASP.NET Core build template. First, we are going to run a restore then we will build the solution and test. We do not have tests at this point in time so we can disable that task by right clicking on it and disabling it. Next, we are running a Publish task followed by a publish artifact task. Let’s save the build definition and navigate to the ‘Triggers’ tab on top of the screen. This is where we can set Continuous Integration build triggers CI triggers for short. For example, let’s say a developer is working on a feature branch called ‘feature/thisFeatureIsAwesome’ and they check in code to that feature branch. There will be no automatic builds after the check-in without any CI triggers. The developer adds a CI trigger called ‘featuure/thisFeatureIsAwesome’ to the build definition. Now when they check in code to that feature branch it will automatically trigger a build for continuous integration. Alternatively, if you have a scheduled time for a build to be run you can set up a CI trigger to run a build at a specific time.
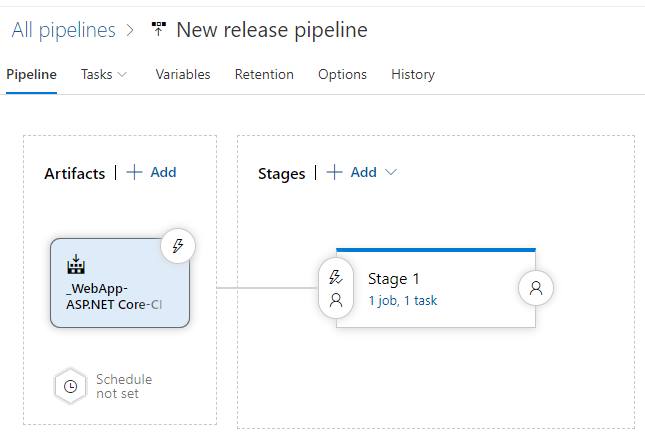
now that the build definition is completed lets created the release definition to upload our code to the Azure App Service. Expand the Pipelines tab in ADO and select releases. Click the option to ‘Create New Release Definition’ and search for the Azure App Service’ template. Click on the stage link to edit the tasks running in that stage. On the ‘Stage 1’ tab we will need to modify some of the parameters. Change the ‘Azure Subscription’ parameter to point to the Azure Service connection we created earlier. Select the App Service name we would like to deploy to and click on the ‘Deploy Azure App Service’ task. Here there are a lot of options which we will discuss in another blog but for the purposes of this blog let’s keep the default settings.
Let go back to the Pipeline tab on the top left side of the screen and add a build artifact. Click on the plus sign next to the artifacts on the left-hand side of the screen. Here we want to add the Web App build artifact from the build. Choose the project and source build then keep the default version as ‘Latest’ Keep the ‘_’ in the source alias and click ‘Add’.
Next to the build artifact there is a ‘Lighting Bolt’. If you select that option it will allow you to set Continuous Deployment Triggers, CD triggers for short. This allows the deployment of your web app to be automated when a new build artifact is available. Let, go ahead and enable the CD Trigger for this release definition. Next, we will need to install git if you do not already have it installed.
Git Download: https://git-scm.com/downloads
Once downloaded we can save our changes in Visual Studio and close it. Let’s re-open Visual Studios and open our solution file. On the bottom right-hand side of the screen you will see and option to add source control. There should only be one option which is ‘Git’. Select it and a new ‘Team Explorer’ window will open in VS. Since we have already created a repository in ADO we will expand the ‘Push to Remote Repository’ option and select ‘Publish Git Repo’. There will be an option to enter the repository URL for the existing repository. We need to ADO and navigate to the repository section and grab the Azure Pipelines Git URL. Select the URL under ‘Clone to your computer’ and paste it into VS. Click the publish button and refresh the ADO repository page. See now the repository has been synchronized with our local repository.
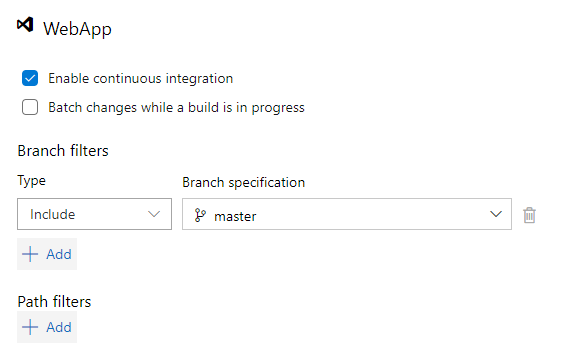
Almost done, I promise! Let’s enable CI on the build definition. Open the Web App build definition and select the triggers tab. Enable the ‘Enable Continuous Integration’ option and verify the branch filter is set to ‘include’:‘master’ and save. Let’s make a simple change to our web app and commit the changes to the local repository and push those changes to the master branch.
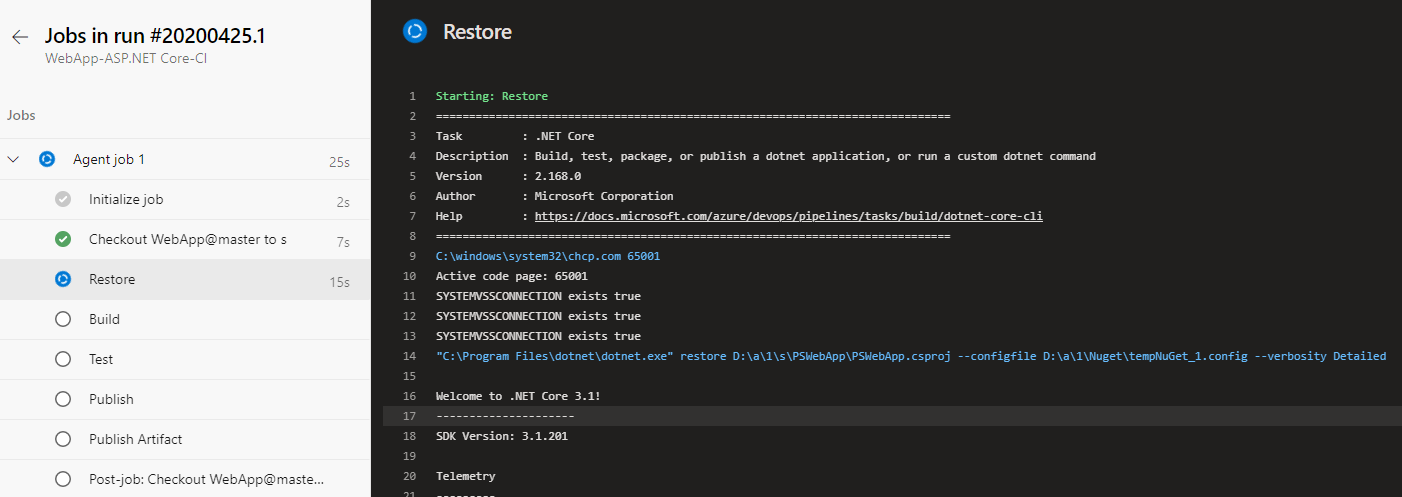
Refresh the ADO build pipelines tab to watch the build get queued, built, and deployed.
Build Pipeline logs:
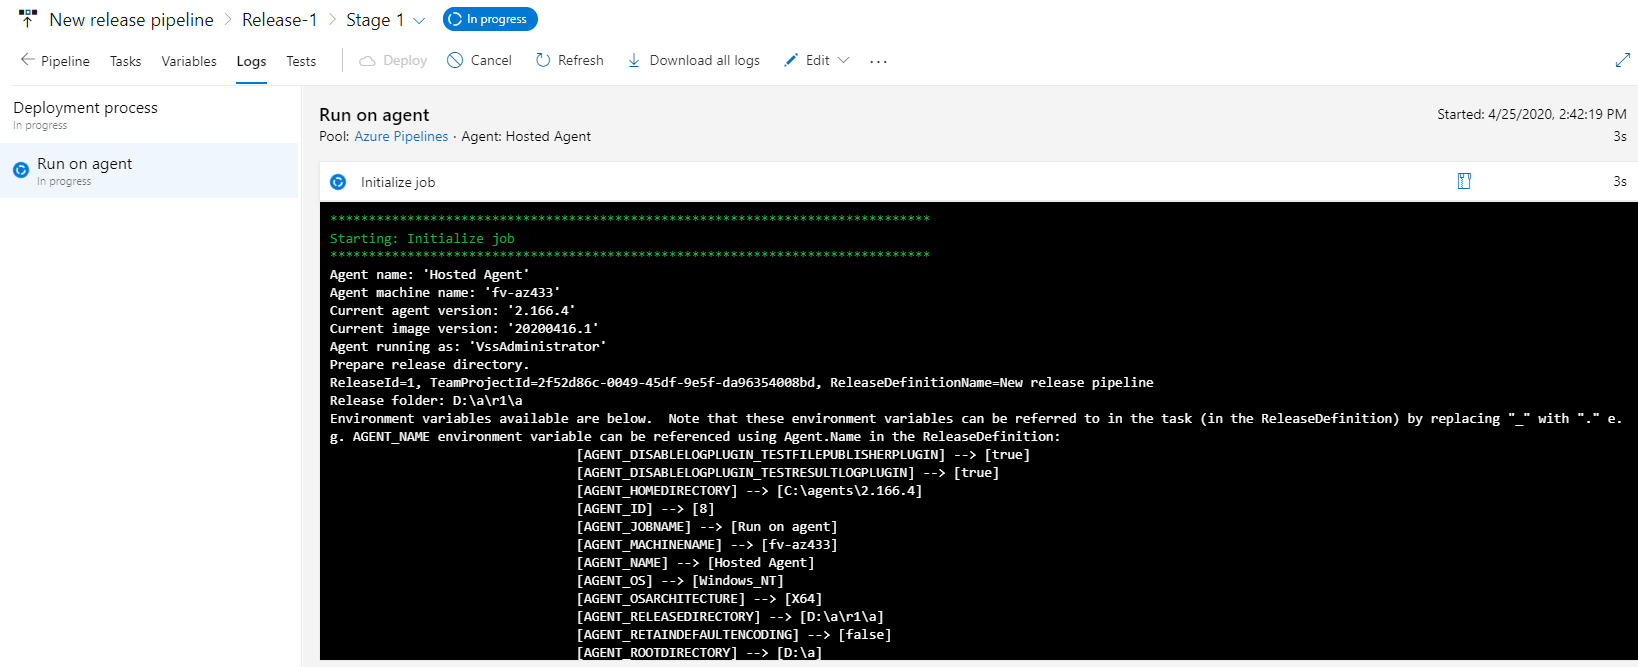
Release Pipeline logs:
Now let’s log back into Azure and check to see if our App Service was deployed.
Eureka! We did it!! We have successfully deployed our web app with Azure DevOps full CI/CD pipeline. I hope you enjoyed this blog and will see you in the next one.
Upcoming:
- Scaling up/down App Service Plans
- Optimizing App Service Plan
- Monitoring App Service Plans
- Converting GUI build definition in YAML
Notes:
- You can access the KUDO site by inserting ‘scm’ between the App Service name and azure website prefix.
- You can have multiple CI/CD triggers for each build and release definition.
- Depending on the repository branching strategies you use the * symbol allows for any build or release to automatically deploy builds/releases. For example:
- release/* - This will trigger any builds/releases off the release branch.
- feature/* - This will trigger any builds/release off the feature branch.
- You can exclude branches from being automatically built by using the ‘Exclude’ option.
- If you want to convert this GUI build definition into YAML, you will need to create an ‘azure-pipelines.yml’ file and place it into the root directory of your repository. To copy the YAML syntax over to the YAML file you will need to open the build/release definition and select the ‘View YAML’ option. Copy the YAML syntax over to the YAML build definition and perform an ‘initial commit’. Verify a build has been queued an you are done. There is alot more you need to know about converting GUI based build definitions but we will talk about that in a later blog.
References: